Monday, March 21, 2011

Installing Eclipse IDE in Ubuntu Lucid

For programmers and Java enthusiasts like me, IDE or an Integrated Development Environment platform is a convenient tool that more or less simplifies programming for us. One way is by simply installing it through the Ubuntu Software Center as shown in the image below. The manager will install it automatically for you.


But if you want to install a different version (mine is Eclipse JEE Helios SR2), I'll share this guide for installing Eclipse (I'll try Netbeans in the next entry) in Ubuntu 10.04 (Lucid). Be sure you already have a working Java installation. Check my previous entry for installing Java JDK in Ubuntu Lucid.
1. First download Eclipse from the Eclipse downloads page. It will automatically detect your platform (Linux).
2. After the download completes, you can extract it first to the same directory where it was downloaded and then later move it to /opt directory so that other users can access it:
$ tar xzf eclipse-jee-helios-SR2-linux-gtk.tar.gz
$ sudo mv eclipse /opt/eclipse
3. Then create an eclipse executable in your path: 
$ sudo touch /usr/bin/eclipse
$ sudo chmod 755 /usr/bin/eclipse
$ sudo gedit /usr/bin/eclipse
4. The last command will create and open a file "eclipse" which is actually your Eclipse executable. Type the following lines and save:
#!/bin/sh
#export MOZILLA_FIVE_HOME="/usr/lib/mozilla/"
export ECLIPSE_HOME="/opt/eclipse"
$ECLIPSE_HOME/eclipse $*
5. Then create a GNOME menu item by entering the following lines after launching this command: sudo gedit /usr/share/applications/eclipse.desktop:
[Desktop Entry]
Encoding=UTF-8
Name=Eclipse
Comment=Eclipse IDE
Exec=eclipse
Icon=/opt/eclipse/icon.xpm
Terminal=false
Type=Application
Categories=GNOME;Application;Development;
StartupNotify=true
It will create a shortcut link in the menu bar, as shown below. Click it and enjoy programming!

Sunday, March 20, 2011

iPhone 4's Internet Tethering and Ubuntu Lucid: High five, waddup!

I have to apologize for the title, I was really amazed and excited in using my iPhone 4's Internet Tethering feature. But I have to check whether my carrier allows this (for free or not?) after reading the wiki and Apple Support. But if it's all safe to use and you're good to go, I have written here a basic setup on how to set it up. Basically it can be used in two ways, "wired" or "wireless". The wired one is when your iPhone is connected to your computer or laptop via the USB cable. On the other hand, wireless is when you are using your phone via Bluetooth or WiFi. In my case, I'm using Bluetooth (just for the fun of it, lol). Follow these steps and you'll be able to tether internet in your Ubuntu box through your iPhone.
1. Turn on your iPhone and laptop's Bluetooth, both will then automatically detect devices. Make sure that your laptop is visible (check your Bluetooth preferences as shown below) If both devices can be seen, we'll then pair them up.

2. Click "Set up new device...", this will open the Bluetooth Pairing Wizard for Ubuntu, and then click "Forward":
3. The wizard will then search for your iPhone, select "Phone" from the Device Type dropdown list to filter your search to phones:
 4. Once selected, it should be able to see your iPhone (or the name you gave it), and set up the PIN for a more secure pairing.
5. Close the PIN Options menu, and then click "Forward":
 6. It will now try to connect to your iPhone. On your iPhone, tap in the PIN that you use in step 5. On a successful pairing, the figure below will be shown:
 7. Now for the tethering, click on the network connections available as shown below. Immediately after your iPhone's name is its MAC address, click on it to connect:
 8. A notification will pop up if you are successfully connected:
And there you have it, internet access via your iPhone device! Enjoy surfing!

Installing JDK (Java Development Kit) in Ubuntu 10.04 Lucid

Trying different operating systems for me is quite refreshing, giving me a different perspective on how things are done (like installing from a CLI or command line). But thanks to the web, we can get numerous help with these things. So I'm sharing this post for those who are using Ubuntu (mine is 10.04 aka Lucid) and Java enthusiast. Luckily, the JDK 6 has been dropped from the Multiverse section of the Ubuntu archive. Following these steps will install the latest JDK in your Ubuntu box.
1. Add the Canonical Partner Repository to your apt repositories: $ sudo add-apt-repository "deb http://archive.canonical.com/ lucid partner"
2. Update the source list  of your repository:  $ sudo apt-get update. After doing so, your machine will download and populate your repository with the proper packages.
3. Install the newly added JDK 6: $ sudo apt-get install sun-java6-jdk. This will then check for the dependencies and install Java in your machine. Accept the license and it's done. The JDK package will be installed in /usr/lib/jvm/java-6-sun-1.6.0.2o4. This will also create a symbolic link that we can use to set our default JDK (java-6-sun).
4. Now select the newly installed JDK as the default Java to use instead of the default openJDK: $ sudo update-java-alternatives -s java-6-sun. After doing so, check if JDK is correctly set up: $ java -version. It should return the newly installed JDK, like in the screenshot below.

And you're done! I hope this post helps my fellow Linux newbies. :)

Wednesday, March 16, 2011

Installing JDK (Java Development Kit) in Fedora 14

I'm still learning tricks in working around a Linux kernel, specifically Fedora 14 and may I say it's basically the same with Windows (as pertaining to GUI and applications). But this specific topic is more of manipulated via a command line terminal, except for the download. I'm putting this entry for Linux newbies like me, and get them started in using Fedora 14 worry-free. :)
1. Download the Java Development Kit from Oracle. The latest version as I write this entry is JDK 6 update 24.
 2. Select Linux platform from the dropdown list and agree to the Java SE Development Kit 6u24 License Agreement and click Continue.

 3. Select the Java SE Development Kit 6u24, use the rpm.bin.
 4. After the completing the download, launch a terminal (Applications -> System Tools -> Terminal) and log in as root.
5. Change to the directory where you've downloaded the JDK, and make the bin file into an executable file: $ chmod 755 jdk-6u24-linux-i586-rpm.bin 
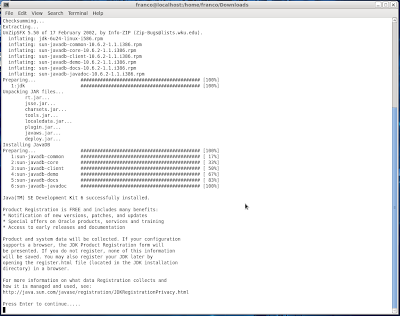
6. Execute the installer: $ ./jdk-6u24-linux-i586-rpm.bin. Press enter to finish the installation. This will automatically unpack and install itself in /usr/java/jdk1.6.0_24, and creates two links in the same directory (/usr/java), default and latest.
7. Establish a JAVA_HOME and PATH for all the users by editing the profile file in /etc/profile and adding the two lines at the end of the file:
  • JAVA_HOME=/usr/java/default; export JAVA_HOME
  • PATH=$JAVA_HOME/bin:$PATH; export PATH
8. Save the file, exit the terminal properly and then logout of the system to make the change take effect. Once logged in, open a terminal and check your java version by typing: $ java -version. The output should be the JDK version that you have just installed (e.g. java version "1.6.0_24").
And there you have it. You can now install other applications with Java/JDK prerequisites.

Friday, March 11, 2011

Detect Agere Systems ET-131x Ethernet controller on fresh install of Fedora 14

Recently I’m trying on Linux and particularly got interested with Fedora. Well one reason is because our server is running on Fedora and curious as I am, I’ve installed one in one my workstation. My curiosity got me going, so I tried to put one also in my LG Xnote P1 laptop. So there, done with the installation, however got problems with my Ethernet controller (Agere Systems ET-131x). So I tried to pull some strings from the net and search for solutions. Several hits came up, unfortunately for FC 11/12 (Installing Agere ET-131x driver for Fedora 11/12) or lower versions. For 2 days I kept on looking for solutions, and I just don’t want to give up. Some sort of a personality in me. Anyway, I stumbled upon an error when I tried installing the said driver in the aforementioned blog that made me think that I probably don’t have an updated kmod (and the driver is for FC 11/12, right?). So what is kmod? According to Chapter 11 of Linux Device Drivers, 2nd Edition, kmod is a facility meant to save you from recompiling your modules each time you upgrade your kernel. So you don’t have to compile your drivers before installing them. (Whew! Thanks a lot!) So without further ado, here are the steps that I did to work around Agere’s ET-131x etherboot controller problem in  my LG XNote P1 notebook with Fedora Core 14 – Kernel version 2.6.35.6-45.fc14.i686.
  1. Download staging-kmod-commons first because it is needed by the next package. For my installation, I used  version 2.6.35.6-1.fc14.noarch.rpm.
  2. Install using rpm: $ rpm -Uvh filename.rpmI suggest to autocomplete the filename since it’s a bit long.
  3. Download kmod-staging rpm for i686. You can find the rpm list by name, packages starting with K. Mine is version 2.6.35.6-45.fc14.i686-2.6.35.6-1.fc14.i686
  4. Install using rpm: $ rpm -Uvh filename.rpm
  5. Reboot then it will automatically detect the eth0 for you, installed driver for your ET-131x Ethernet controller and a working network. :)
So there you have it, I hope this post helps.

Share

Twitter Delicious Facebook Digg Stumbleupon Favorites More